Categories
How to email an Excel spreadsheet?
It sounds simple, but many struggle with this daily task. Excel spreadsheets are essential workplace tools, supporting everything from simple data analysis to complex business analytics. Yet, sharing them is often an overlooked skill.
Imagine you’re finalizing a report, and it’s time to share it. A wrong file format or attachment error can lead to delays, lost data, or frustration. Studies show nearly 30% of email errors stem from improper attachments. Missteps in sharing could affect your work and credibility.


Knowing how to email an Excel spreadsheet efficiently isn’t just practical—it’s essential. Do you want your team to create advanced Excel charts for clients? Or do you want them to test various types of charts and graphs? Understanding the right method of emailing the Excel data ensures professionalism. Should you attach the file, use cloud sharing, or compress it? Each option depends on the situation.
Don’t forget email security. Reports reveal that 91% of data breaches start with phishing emails. Sending sensitive spreadsheets without proper encryption or restrictions can expose you to risks. Mastering secure sharing practices protects your work and reputation.
The process is easier than you think. Simple steps save time, reduce errors and improve collaboration. With confidence, you can send your spreadsheets effectively every time.
First…
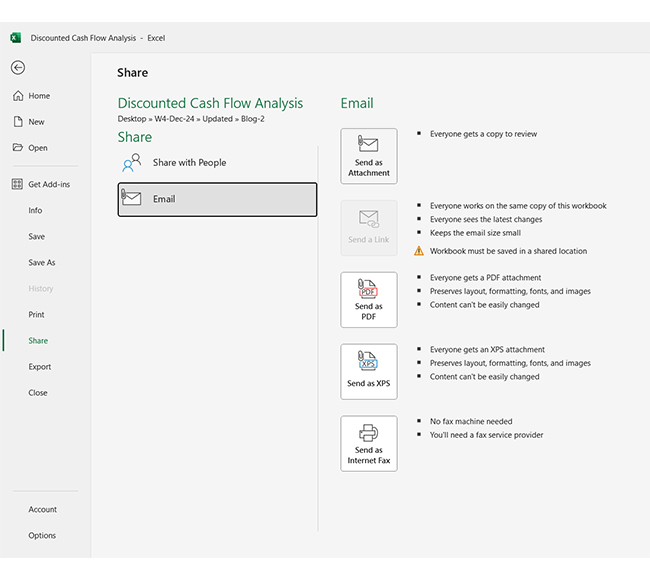
To email an Excel spreadsheet, Open your email, click the attachment icon, and upload the file. Add a clear subject line and message explaining its purpose. Review, then click “Send” to share effectively.
Finally, click “Send”. You’ve successfully emailed your Excel worksheet.
Sharing an Excel spreadsheet through email is common, but doing it saves everyone time and frustration. Here are three essential tips to ensure your file is ready to impress:
Need to email an Excel spreadsheet? It’s more than just attaching the file and clicking “send.” A few steps can ensure your email is clear, professional, and effective. Follow these tips on “how to email Excel spreadsheets” for better visualization sharing:
Emailing an Excel spreadsheet sounds easy. But there’s more to it than hitting “send”. Excel excels at organizing data, but its visuals can fall flat. That’s where data visualization tools come in. They make interpreting data easier and more impactful.
Turning numbers into insights is essential. ChartExpo – an Excel Charts Add-in and one of the robust Add-ins for Excel Mac brings your data to life. Vibrant, clear graph design ideas help convey messages more effectively. They simplify complex data, making it easier to understand and amplifying data storytelling.
Your visuals should stand out when emailing. A well-designed chart can change how your audience views the information. Choose tools that integrate seamlessly with Excel. With the right visual aids, analyzing and interpreting data becomes effortless.
Sharing Excel charts via email requires care. Attach files correctly to avoid errors. Use secure methods for sensitive data, like encrypted emails or cloud links.
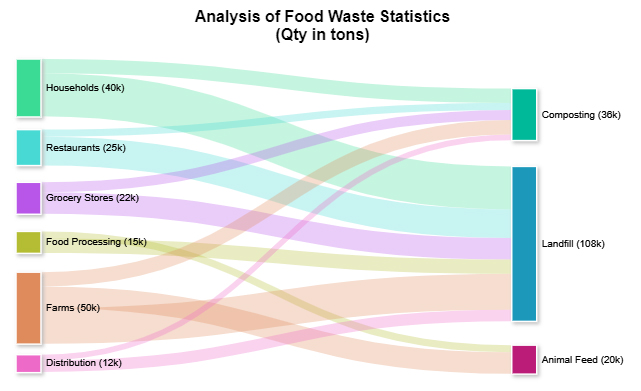
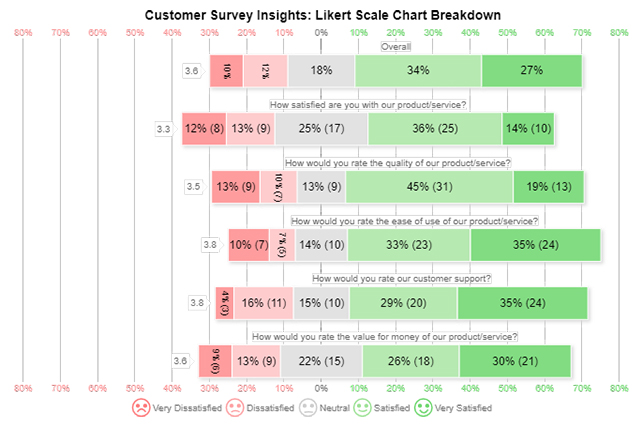
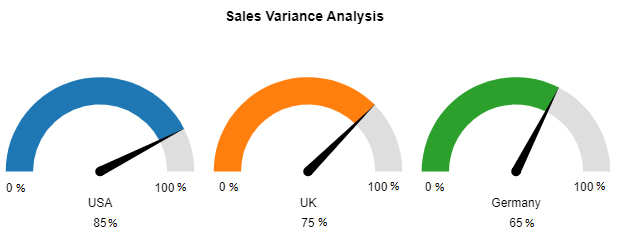
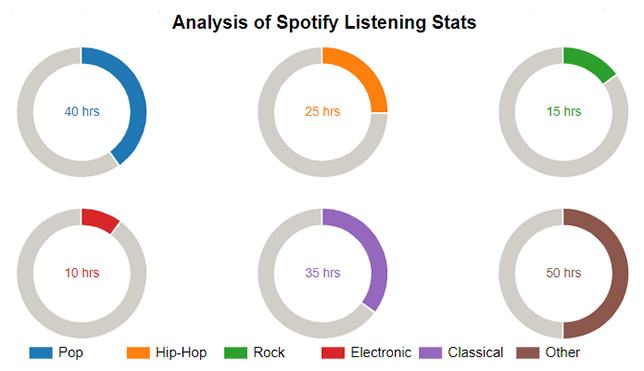
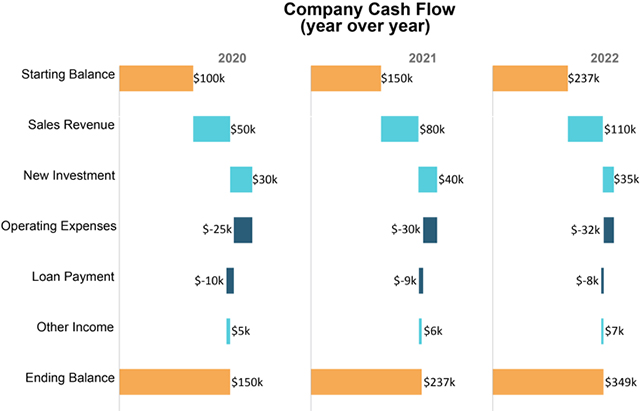
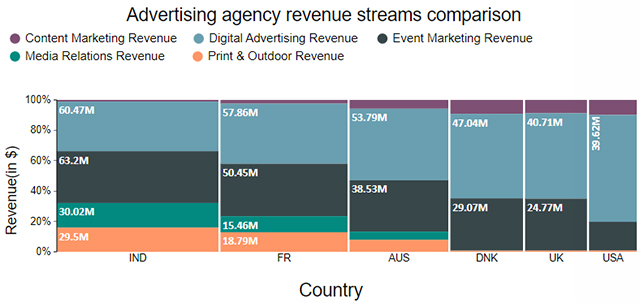
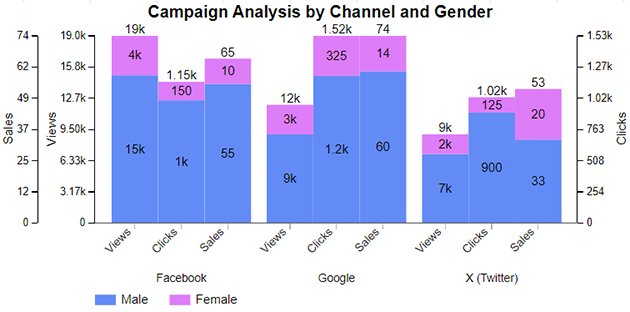
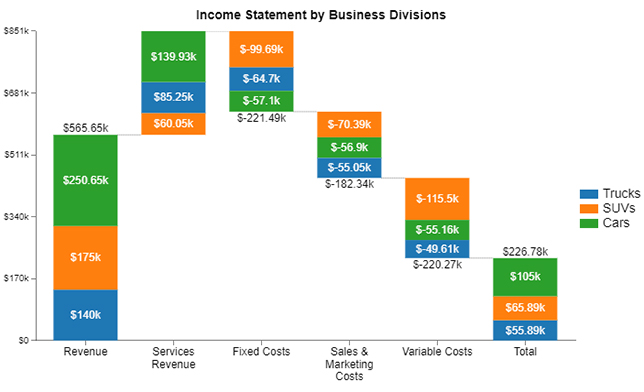
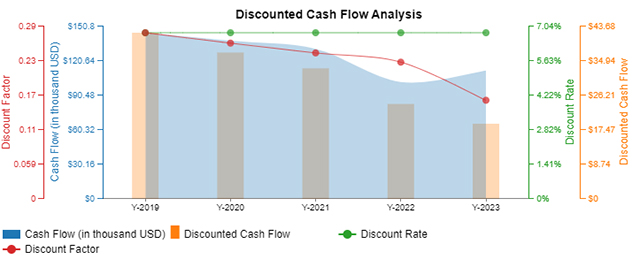
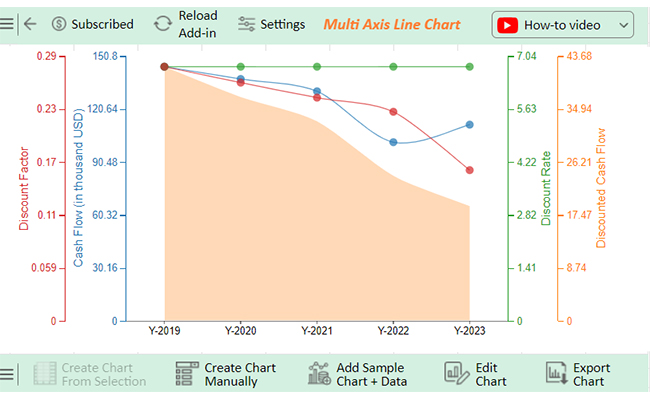
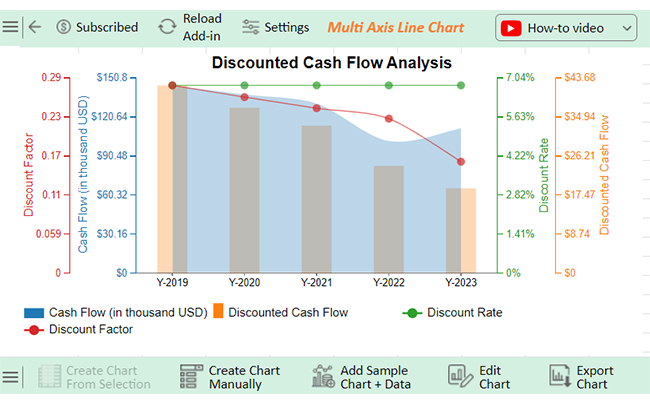
Below are cool Excel charts and graphs created using ChartExpo:

Let’s learn how to install ChartExpo in Excel.
ChartExpo charts are available in both Google Sheets and Microsoft Excel. Use the CTAs below to install the tool of your choice and create beautiful visualizations, including a Waterfall chart, with just a few clicks in your favorite tool.
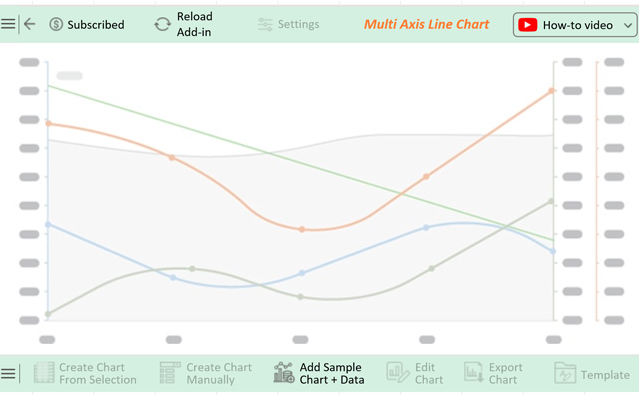
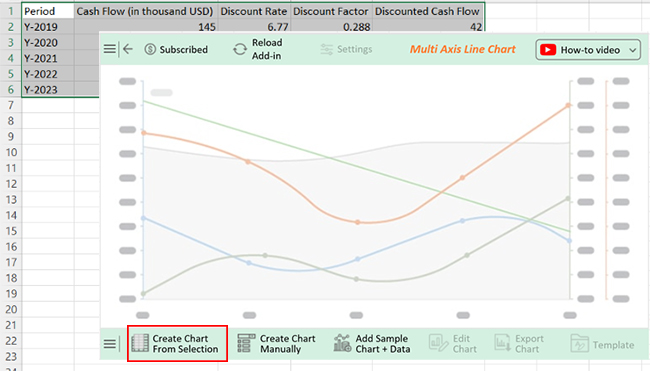
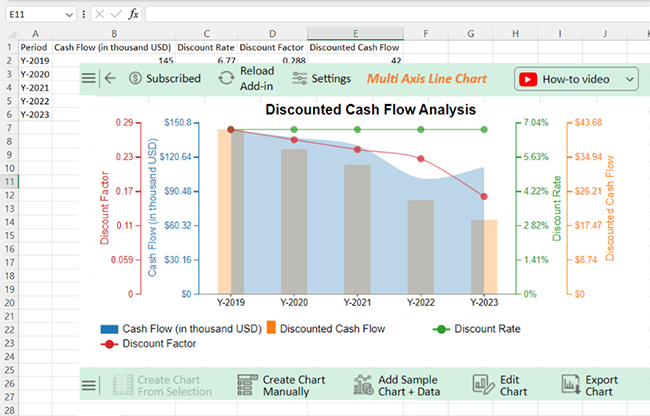
Let’s see how to turn this sample Excel data to graph using ChartExpo and enhance visual analytics.
| Period | Cash Flow (in thousand USD) | Discount Rate | Discount Factor | Discounted Cash Flow |
| Y-2019 | 145 | 6.77 | 0.288 | 42 |
| Y-2020 | 138 | 6.77 | 0.27 | 37 |
| Y-2021 | 131 | 6.77 | 0.253 | 33 |
| Y-2022 | 102 | 6.77 | 0.237 | 24 |
| Y-2023 | 112 | 6.77 | 0.171 | 19 |


Here’s a simple guide to sending part of your Excel spreadsheet by email. Let’s make it quick and easy—no fuss, no stress. Follow these steps:
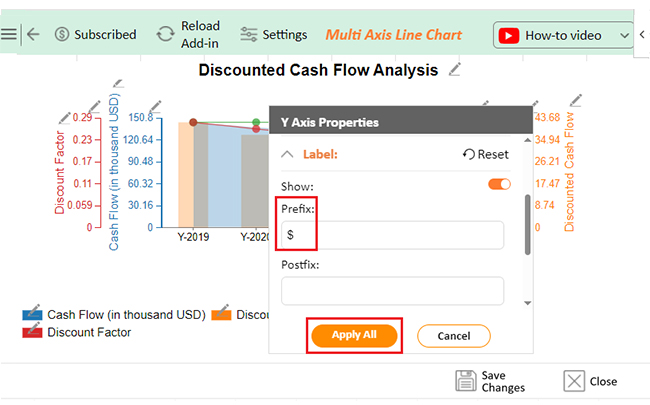
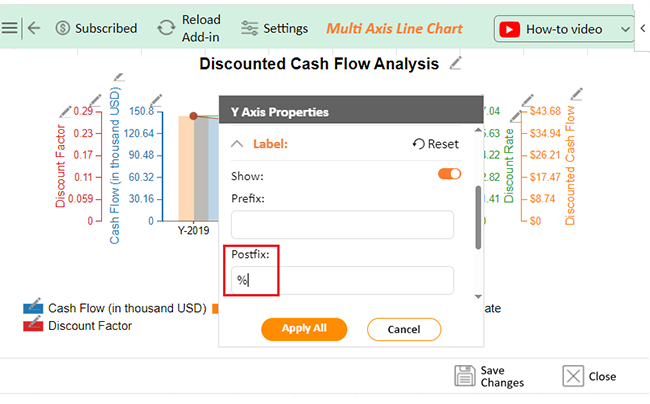
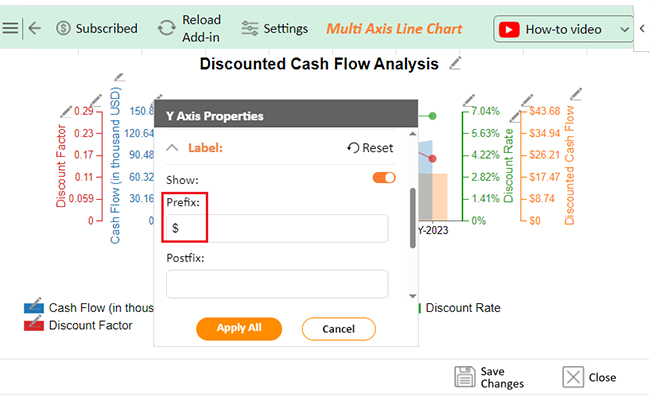
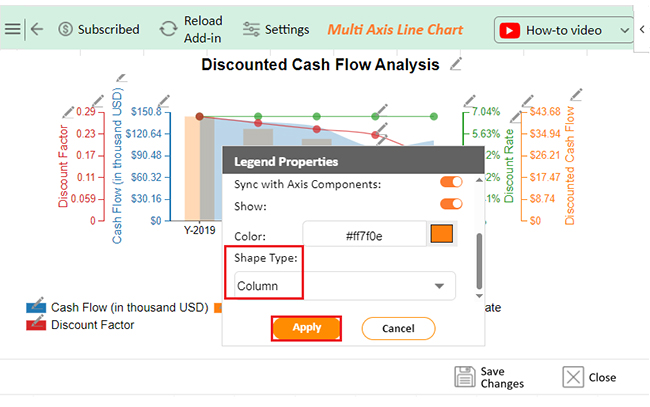
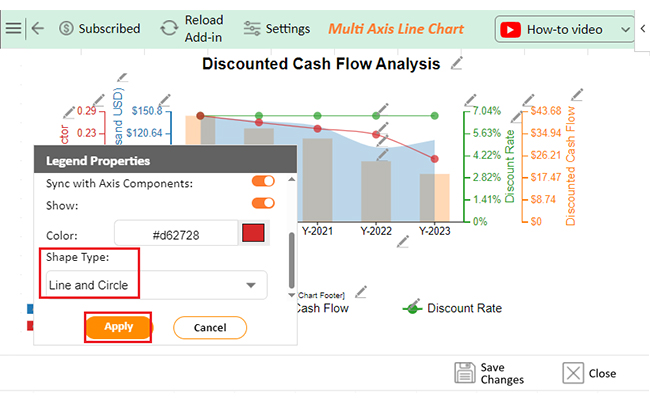
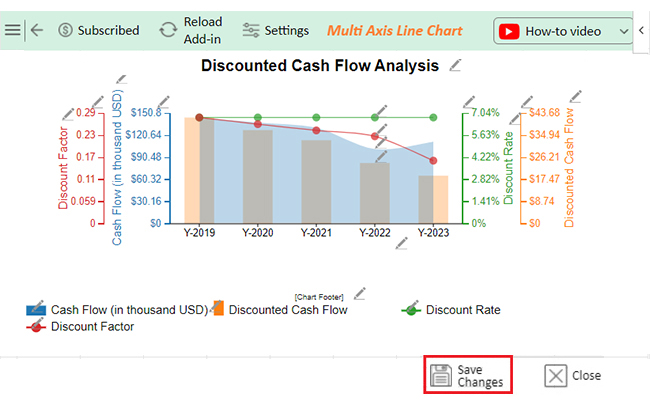
The following video will help you to create a Multi-Axis Line Chart in Microsoft Excel.
To send an Excel spreadsheet by email;
To share an Excel spreadsheet:
To copy an Excel spreadsheet into an email:
Sending an Excel spreadsheet via email is easy. Prepare your file, ensure its content is accurate, and save it in the proper format for sharing.
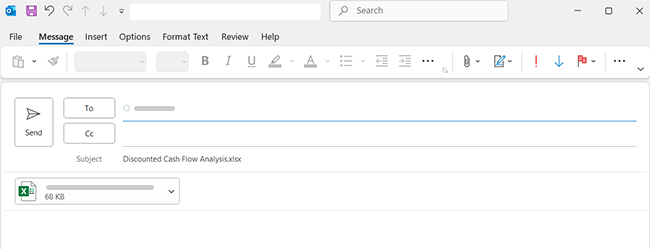
Next, open your email platform and attach the file to a new email. Use the attachment button, usually shaped like a paperclip, to find the file’s saved location and upload it carefully. Large files may take extra time to load.
Add the recipient’s email address and create a clear subject line. Write a brief message explaining the file’s purpose. Before sending, review your email; check for typos, errors, or missing details. Confirm the correct file is attached.
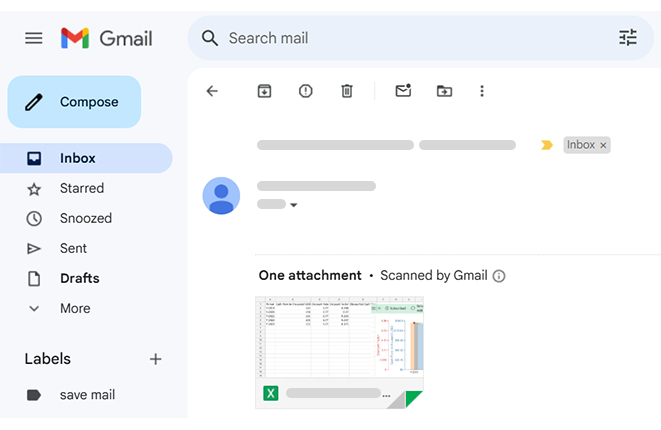
Finally, click “Send” and monitor for any delivery issues. Inform the recipient if follow-up is needed.
To improve your Data Analytics and when considering between tables vs. charts, try add-ins like ChartExpo for Excel Mac. It enhances Visual Storytelling with advanced tools. ChartExpo supports Data-Driven decision-making and better communication.
How much did you enjoy this article?


Learn how to use sparklines in Excel to quickly visualize trends inside cells. Discover types, creation steps, customization, use cases, benefits, and best practices.

Learn what a confidence interval graph is, how to create it in Excel, and how to interpret results to make more reliable, data-driven decisions.

A correlation matrix in Excel helps identify relationships between variables. Learn how to create, read, and use it for effective data analysis.


